Optimizing Art Files for Neon Ink Printing [BETA feature]
Please Note: Neon printing is only available for select beta users at this time. As we scale our neon capabilities, we are intent to roll out the feature to all users, in the near future.
IMPORTANT: We will not be able to detect your NEON intent unless you name the product with NEON as the first word in your product. If not named in this format, your item(s) will be produced with standard production processes.
Overview: We're thrilled to offer intensely bright neon printing! While your standard JPEG files can serve this need from time to time, for best neon representation, you will need to take special consideration when creating art files for your products. Without the following steps, reliably color matching for neon colors will not be achievable.
Whether updating existing, or creating new, products, color settings within the file must contain CMYK values.
____________
COLOR THEORY & MAPPING: There are a number of facets in understanding your digital design beyond how to control a color setting.
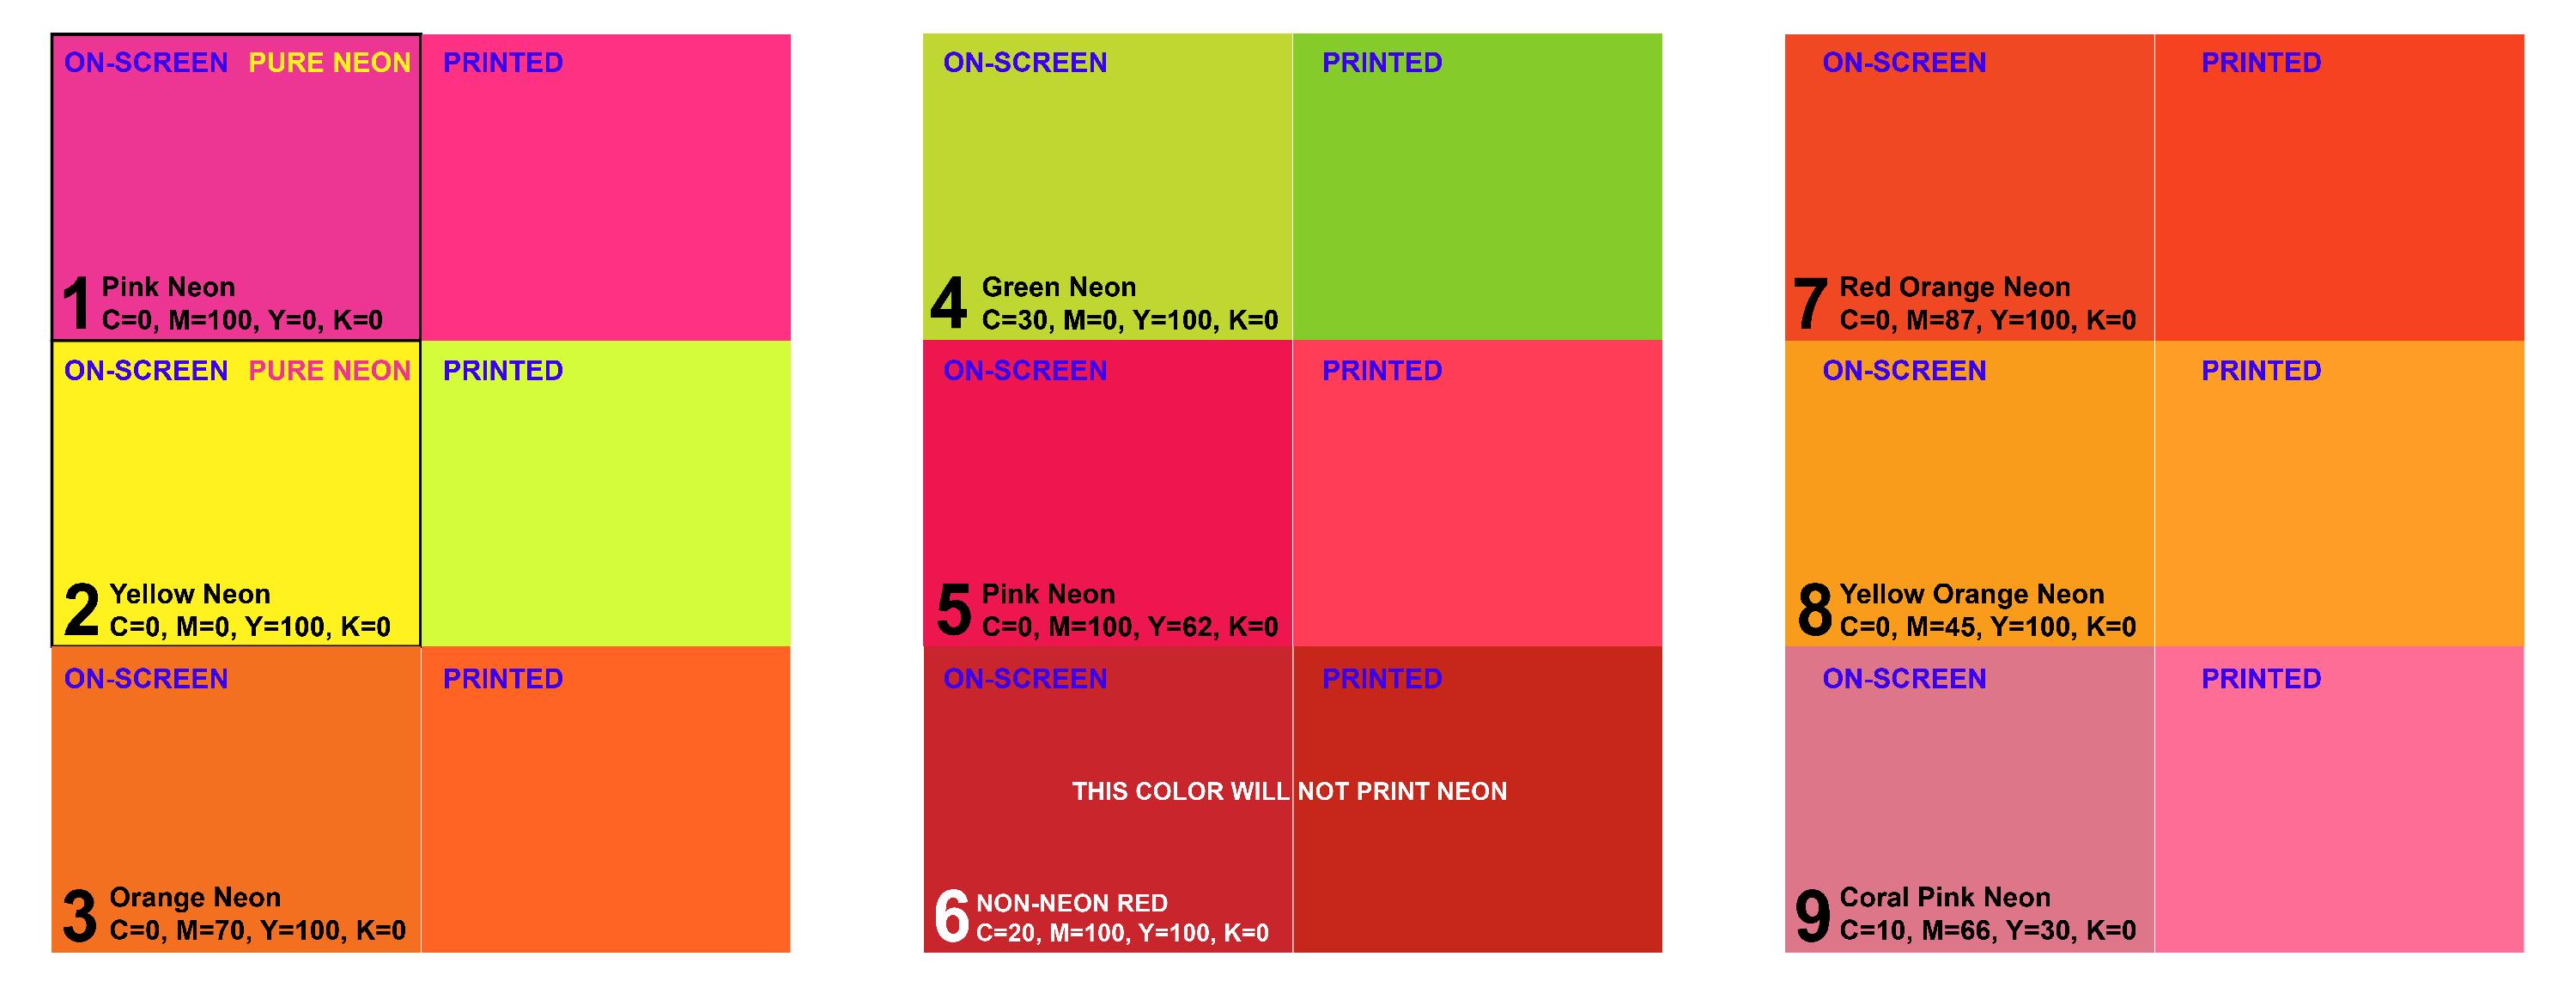
- CMYK values are not naturally NEON, though they will print neon based on our adjustments made to the print production process.
- All fabrics absorb ink differently and there may be small pigment differences between one style and another. We highly recommend ordering samples prior to major campaigns or large orders.
- See below for a matrix grid of approved neon colors, to understand how your digital color (with inline CMYK values) will print on fabric.

____________
To edit these values please follow the step-by-step process below:
1) CONVERTING TEMPLATE TO CMYK
- Go to “file”
- Select “document color mode”
- Select “CMYK color”

2) CONVERTING PANELS TO CMYK
- Make all layers visible
- Go to “object”
- Select “unlock all”
- Select all [CTRL-A] or [CMD-A]
- Go to “edit”
- Select “Edit colors”
- Select “Convert to CMYK”

COLORING
The primary colors used in neon printing are Yellow and Pink (in place of Magenta). Printing of other neon colors is achieved by mixing those two colors with other standard colors (e.g. neon green or blue). For true yellow and pink prints, the steps below should be followed.
For other colors, consult a Pantone chart and follow the steps below to identify the best CMYK values, before conducting the steps below to set them.
3) ADDING NEON PROCESS COLOR SWATCHES (YELLOW & PINK)
- Go to “Window”
- Select “Swatches”
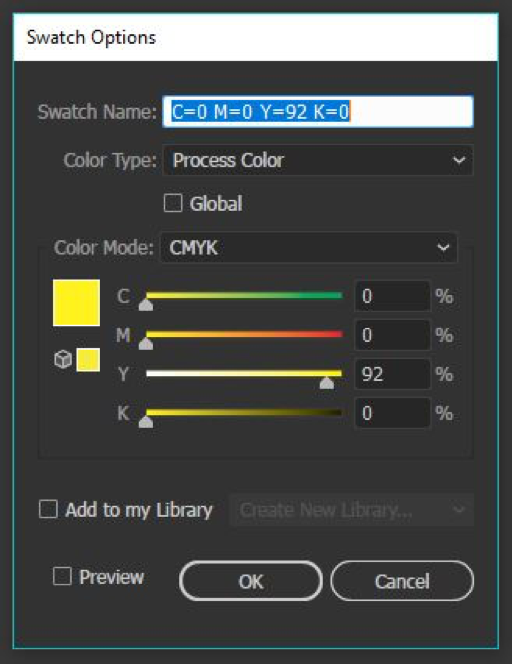
- NEON YELLOW: Select “New swatch” icon bottom right
- Change swatch name to “C=0 M=0 Y=92 K=0”
- Change color type to “Process Color”
- Color mode should be “CMYK”
- Match values to screenshot to create Neon Yellow swatch
- Select “ok”
- NEON PINK: Select “New swatch” icon bottom right
- Change swatch name to “C=0 M=92 Y=0 K=0”
- Change color type to “Process Color”
- Color mode should be “CMYK”
- Match values to screenshot to create Neon Pink swatch
- Select “ok”

____________
Your template is now setup for neon! For any area of your art that you want to print with neon ink, use either of the two swatches above.
PLEASE NOTE TO EXPORT YOUR FINAL PRINT FILE IN CMYK
